部落格
HP printers are considered supremely fine devices that have been serving users with the top security and advanced features. It is notable that HP devices are innovatively way ahead of the present technology and appears as the most performing printer devices. However, there could be such issues that may reduce the experience using the HP Printers. Malware and virus attacks may happen anytime if you are not taking security advances. There could be several factors to garner the attacks of virus and malware. These situations may happen during the connection setup to the computer, laptop, or mobile devices. the connectivity with the internet may also cause the virus attack. However, there are some certain methods through you can easily remove these viruses and malware from the HP printer and resume the work to accomplish the printing tasks. You can contact at HP Printer Customer Support Number and get complete support and advance guidance. Right now, you can get a better idea mentioned in this blog.
Easy
steps to remove virus and malware from HP printer:
You should restart the computer at first and then start to follow
these steps mentioned below:
Method 1. Download
Junkware removal tool
·
First, you close down
antivirus software.
·
Now right click on JRT.exe
and select run as administrator on windows.
·
That will start a complete
scan of your system.
·
Within a minute, it will be
completed.
·
Then you can enable the
antivirus software again.
Method 2. Download
adwCleaner by Xplode
·
Go to adwCleaner
icon and run as administrator.
·
Accepting the terms of
use and wait for a while.
·
Once the database is
updated, you need to click on scan.
·
Then after click to
clean and reboot your PC.
Method
3. Download Sophos free virus removal tool
·
Double click on the
tool icon and run it.
·
Then going next, you
need to accept the terms and condition.
·
Now click to next two
times and click to install.
·
Within seconds it will
be installed, and now you can start scanning viruses.
·
After scanning process
finished, you may find some corrupted files and documents.
·
Click on details and
open logfile.
·
Paste these results in
reply and close all the windows.
·
Now click to start the cleanup
and exit the programs.
·
Then you can reboot
your system.
These methods are able to solve the issue and remove the virus from the HP printer easily. You can also get connected with the HP Printer Technical Support for further information and detailed support to get the issue easily fixed.
Read more:
Source
URL: How to fix Virus and Malware Issue
on HP Printer
HP Printers are highly efficient devices which provide the users with best in class print outputs. They have always ensured that the users get the best quality results while using HP printers. There are multiple models available for the users to select from depending upon their needs. HP provides the users with printers which best suit official needs and even printers which are ideal for house use. Even though they are highly renowned all over the world, there are certain malfunctions which the users face while using HP LaserJet printers. One such issue is when the users come across ‘Scanner Error 22.’ This is an error where the users would receive an error message displayed on their printer control panel while they are trying to scan from the printer. This error is generally caused due to extra weight or even when pressure is applied to the scanner glass during the time of scanning. The users can easily connect with HP Printer Customer Support Number and avail assistance regarding the issue.
Ways to solve HP LaserJet
Pro Scanner Error 22
If you wish to solve the scanner error 22 which you
have encountered on your HP LaserJet Pro, then the steps that you would have to
follow are as given below:
Step 1: Power
on the printer
·
The user would have to connect with the printer to a reliable
power source and turn on the printer.
Step 2: Check whether the printer is in idle state
·
The user would have to wait to find out whether their printer
is in idle state or silent.
·
The user can simply disconnect the power cord from the rear
side of the printer in a state like this.
Step 3: Unplug
the printer
·
The user would have to unplug the printer from the power
source and let the printer rest for at least 60 seconds.
Step 4: Plug
the printer back to the power source
·
Now the user would have to reconnect to the power source.
Generally, the printer would automatically turn on if this not happen, the
users would have to turn on the system manually.
Step 5: Warm
up Phase
·
The user would then see that the printer is going through a
warm-up phase where the printer lights would be flashing, and the carriage may
move.
·
The users are suggested to wait until the warm-up period
completes its task. The printer would be in idle mode or silent mode before the
users can start using it.
Why connect with HP
LaserJet Customer Support?
When the user comes across issues like Scanner error 22 while working on HP LaserJet Pro, there is nothing that they would have to worry about. In such a situation, the users have the option of connecting with HP printer support Number. This service is available throughout the day and is completely free of cost. The executives would then ensure that the users attain complete satisfaction against the issue that they are facing.
Read more:
Source
URL: Fix HP LaserJet Pro Printers Scanner Error 22
Every HP monitor, laptop or printer comes with a serial and model number which makes it unique and also acts as an identification code so as to distinguish it from other models. With the help of this code, you can identify your particular device and differentiate it from others as all of them are actually the same (owing to the same features and specifications of a single model). You can easily locate the model and a serial number of the HP monitor by some simple steps. It would be suggested that you read the blog and go through the procedure and later on take help from HP Printer Tech Support Number for further instructions.
There
are two ways by which you can find out the model number. Let’s look at each of
them separately.
Method 1- Using the system
information
·
Open the run
dialog box for prompting the command. For that either click on the start menu
and type ‘run’ or press Windows and R key together.
·
In the dialog
box, type msinfo32 and click on Okay.
·
You will be
taken to a list. Look out for ‘System SKU’.
·
The number which
will be written in front of it will be the model or serial number. It can be a
combination of special characters, alphabets, and
numbers too.
Method 2- By looking at the product
number.
This
method can be applied for HP laptops for which the battery is detachable.
·
Shut down the
system and remove the external peripherals and power cord, if connected.
·
Slide open the
battery. It can be usually done by pressing the two click buttons and sliding
it forward.
·
Sometimes, there
is a sticker on the back side of the
laptop or on the CPU, and for that, you
don’t need to remove the battery.
·
Look out for the
product information on the sticker.
The model numbers will help you to ensure that the hardware is compatible with the system and can also give you information about who is trying to service the product. Even though the solution is really easy, but if you find difficulties in any regards or is not able to identify the serial number by the given two methods, then you must surely get in touch with HP Printer Customer Care. The adepts at this service will be able to guide you with technical solutions that would work for sure.
Read
more:
Source
URL: Unable to Find the Model and Serial Number of HP
Monitor
HP printers have been serving customers for a long time. They have been one of the most efficient printers in the market, catering to all the different needs of the customer and at the same time not sacrificing the quality of the print job. Printers are an electronic device which runs using a driver software, which makes it prone to several malfunctions. It can prove to be really frustrating to encounter errors when you are trying to print a document. The error that has been lately annoying a lot of users is an error of “Printer needs user intervention”. This error could come up due to several reasons, some of which are the print job being corrupted, the spooler is inactive or even because the vital driver is found missing. Errors like these can completely stall your printing process which could be vital during a crucial point. HP ensures that their customer is never caught up with any such errors and has provided their customers with an effective after sales customer service. If you are HP printer users and you come across any issue, you can easily find solutions to it by contacting the HP Printer Technical Support Number. In this service, they deploy efficient and enthusiastic professionals to assist you with your concern. Some basic methods to troubleshoot the error of user intervention being needed has been given below:
·
Restart the print job
o
Click on the start button and navigate to
Devices and Printers
o
Select the active printer and opt for the option which says ‘See What’s
Printing’.
o
Right click on the print job that you wish
to restart, and opt for the restart option
·
Clear the print queue
o
Simply turn off the printer to clear the
queue
o
Ensure that the printer spooler service
has been stopped
o
Using the windows+R command and type
‘services.msc’
o
Double click on printer spooler which
would open a different window, select the stop button which would turn the
spooler off.
·
Utilize the Printer Troubleshooter
o
Search for ‘Printer’ in the search box
o
Find and choose the option which says
‘Find and fix printing problems’
o
Opt to run this as an administrator
o
After the analysis is complete, click on
‘Apply repairs automatically’
·
Reinstall the printer driver
o
In the search box, search for ‘Device
Manager’
o
In the window of device manager, select
and right click on the printer and choose to uninstall option.
o
This would uninstall the printer driver
from your device
o
After the above-said
procedure, you can install the printer driver again.
If you are unable to solve the printer’s user intervention issue with the above-given steps, there isn’t much to be worried about. You can still contact the HP Printer Customer Support where you would get professional assistance regarding your issues. This service is available throughout the day and it does not charge you any money to avail this service.
Read more:
Source URL: How to
fix user intervention on HP printer
Printing and scanning documents and files facilitate the exchange of information and expand communication. HP has an entire range of devices that can perform both tasks at the click of a button. Because of the many intricacies involved in the working of a printer, users find it difficult to solve printing and scanning related error on their own. If you are faced with a scanning problem while using your HP printer you can always contact HP Printer Customer Care Number for technical assistance.
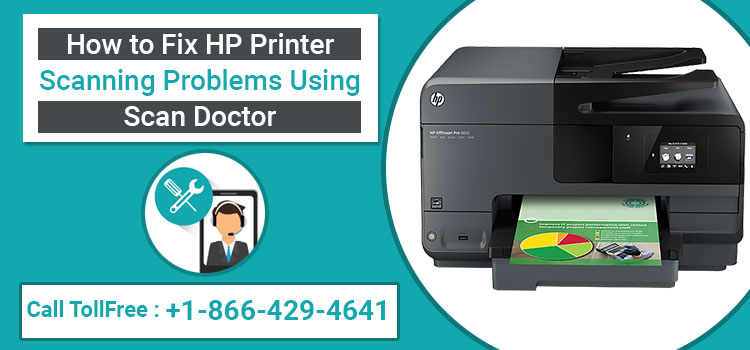
Apart from 24 hours customer service, HP also offers its
users a free tool to help users fix common printing and scanning related
errors. The tool is called HP Print and Scan Doctor and it is available free of
cost for all users. Continue reading to know how to use this tool to fix HP
Printer scanning problems.
Steps to Download and Run HP Print and Scan Doctor
Here are the steps you can follow to download, install and
run the HP Print and Scan Doctor tool so that you can fix the scanning issues
with your printer:
Step 1: Check all the cables to make sure your HP printer on
and is connected to the computer.
Step 2: Visit the official HP website and download the
HP Print and Scan Doctor tool and save the file on your system.
Step 3: Open the file and follow the follow prompts to
install HP Print and Scan Doctor.
Steps 4: Open the tool and go the start menu on the
welcome screen to see the list of printers.
Step 5: Select the HP printer that has the scanning errors
and then click ‘Next’. In
case your printer does not show up on the list just click on ‘My product is not
listed’, follow the instructions carefully and then retry.
Step 6: The software works automatically and you just need
to click ‘Fix Scanning’.
Step 7: Sometime the HP Print and Scan Doctor tool may
require you to install the printer software to resolve the issue.
Step 8: When the tool has finished running the scan review
the test results take the necessary action.
HP Print and Scan Doctor test results and required action
After the tool has finished scanning the printer you will
see a brief summary of the scan along with the action that needs to be taken to
completely fix the problem. Here is a list of the test results and what does it
mean:
Checkmark: the
printer passed the test.
Wrench: issue
found and repaired.
Exclamation point:
test failed and required user action.
X: follow screen
instructions to resolve the issue.
This tool will help you fix the most basic scanning related errors. However, if the tool cannot solve the problem then there may a technical problem with the hardware that needs to be checked. You can call the HP Printer Tech Support Number and speak to a certified professional on how to proceed.
Read more:
Source URL: HP
Printer Support
HP is a brand that is regarded and is widely known for delivering meticulous and mind-blowing products in the market and HP Printers are one of them. The Printer is known for providing excellent print quality and amazing image output. This particular device has grabbed the attention of a lot of people across the globe due to its excellence and amazing features. Since the world is now advancing to a techno-friendly atmosphere, so the common people also prefer having these products at their home or workplace. Whenever you purchase a printer, you must also be getting a catalog along with it which gives you an understanding of its parts, setup, and other necessary information. If you do not take the proper care of the printer from time to time, then there is a high possibility that it can be overloaded with snags and technical glitches. The bugs can be associated with software and hardware issues. Whenever you are giving the command to your printer for the print job, and suddenly an error message in the form of a number or alphabets displays, you can sense that something is wrong with the printer and it needs to be fixed on an immediate basis. One of the error that the HP printer can go through is error code 50. 4. This is an error associated with the Fuser Roller which comprises of a part of the printer, and this part plays a very important role in transferring the toner to the print images. If this part gets damaged or corrupted, then it becomes really difficult to continue with the print jobs. By reading this blog, you can know the solution to resolve this error. You can also get in touch with the HP Printer Customer Care Number and have word with the techies.
Causes behind this
error:
Since this snag is
typically associated with the fuser roller, so these can be some of the
specific reasons that can lead to this error:
- Overheating
of the Fuser Roller
- Using
the printer for quite a long time period, thus resulting in heating of the
device.
Steps to resolve this
error:
- You
must close all the print jobs that are in queue if this error code
displays on the screen or if you find that your printer is getting
overheated.
- Let
it cool down for some time and just remove the USB cable and power cord
and switch off the main supply.
- Open
the rear door and locate the fuser roller. You can look for its procedure
in the catalog given to you or by visiting the official HP website.
- After
you have located the Fuser roller, check that it is not damaged. Replace
it with a new one and install it in the printer by following a set method.
- Once
done, connect back the USB cable and power cord again and try to print a
test page.
If the output is successful, then you can continue working with your day to day tasks, but if you find that still something has not been resolved, then the recommended option is to reach out to the HP Printer Tech Support and have a word with the techies.
Read more:
Source URL: How to fix 50.4 error in HP printer
When you are a user of HP printer and recently you have updated your Windows 10, it may possible you will encounter with some hitches. With Windows 10 several kinds of issues appear after the update it. To fix the issues those appear after updating Windows 10 you can contact to customer care experts. Via HP Printer Customer Care Number 1-800-234-6190 you can easily reach to experts those are available on the call to resolve the printer hiccups. After all, there are some steps given which you can follow for troubleshooting.
The solutionfor resolving
printer issue due to updated Window:
When you get this point that your HP
printer error is because of an updated
version of Windows 10. Then you should try to fix the problem as given here.
1.
First of all, you will have to restart
your Window by click on restart button.
2.
Then check your printer has
compatibility with Windows 10. Sometimes
issues appear due to incompatibility.
3.
If you found that your printer is compatible
with Windows 10, then install Microsoft printing troubleshooter.
4.
After complete installation of this software, you can click on diagnose.
5.
You can detect, diagnose and fix the
problem by using this software, but if the problem persists go to next step.
6.
Uninstall the HP printer software and
driver.
7.
Now proceed to reinstall the printer
driver and software.
8. Set
up your HP printer with a computer which
has Windows 10.
Finally,you can check your printer is working or not by sending a test print. Send a
test print job and if your printer’s issue gets
fixed then you can continue your work. But if you are having the same issue just call on HP Printer Customer Service Number. Via this number, you can anytime connect to the trained
professionals of customer support. Service of these experts is 24 hours available all the day without any
delay. You can reach out to the technicians all the time whether it is day or
night experts are available for you.
Source URL: HP Printer issues after updating Windows 10
